Showing posts with label lesson 1. Show all posts

Tuesday, January 24, 2012

Time and a Half


 I've never been one for small aspirations. As a kid, if they told me to build a model building out of paper, I was
 going to use the longest, thinnest paper available and hold the thing together by sheer force of will. After college, I
 wanted to work in science museum, so I picked the best one I knew of, got an (unpaid) internship, and flew
 across the country to start working two months later. When I decided to learn to snowboard, I took the ski lift to
 the top of the bunny slope, strapped in, eavesdropped on a kids' lesson to learn how to stand up, and went off to
 go snowboarding.

 I mention this because I know my own tendencies, and I suspect that my next project is beyond the scope of
 anything else I've tackled so far. I want to make a wooden clock.

 I chose a gear for my first SketchUp tutorial for a reason. I have a major soft spot for anything clockwork
 (from *before* it was popular, thankyouverymuch) and a serious penchant for little
 fiddly projects. I think precision makes things beautiful, and if you've ever seen the inside of a mechanical
 watch, you'll know that it's been precision-ed to death. So, a clock it is. Wooden because metalwork is a little
 beyond me right now and besides, look at this thing. It's gorgeous. This particular one is done by an immensely talented woodworker named Wayne Sutter.
This is gorgeous, and it's not even finished in this shot. Go buy a clock from him - we need more craftspeople like this.

 Clocks, especially mechanical ones, are amazing and complex works of careful engineering. Sounds like a
 great amateur project, doesn't it?
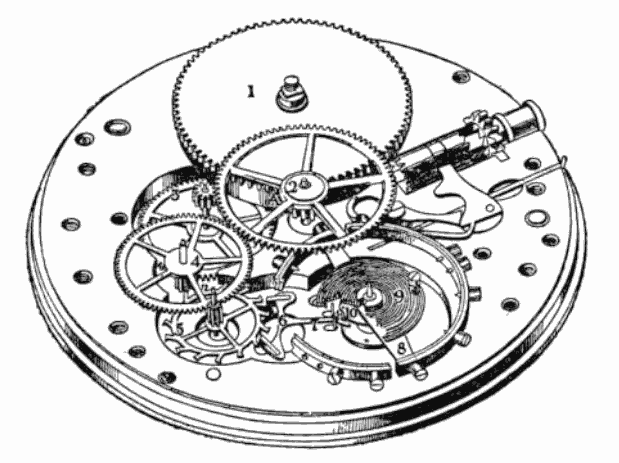
Image from Wikimedia Commons. Yay public domain!


 Clocks from the inside out
 Initial impression: Holy crap, there's a lot of vocab here. Right off, we have: mainspring, arbor, going
 barrel, ratchet, pawl, pinion, wheel train, escapement, remontoire, and balance wheel, just to name a few.

From a mechanical perspective, I think that the easiest way to tackle a watch movement (the whole thing in the back of a clock or watch that makes the thing go) is to trace the energy. Energy goes into the watch when you wind it, and out of it as the stored energy is expended in making the hands turn and the escapement oscillate (and the alarm go, and the cuckoo bird cuckoo, etc.). When you wind a watch, you spin a post, or turn a key that turns a post, called an arbor. The arbor connects to a spiraling strip of metal called the mainspring.
The mainspring.
Image from Wikimedia Commons.

 The mainspring is attached to the arbor from the inside of the spiral, making the whole thing look a little like a spinning top, or maybe a barred galaxy if you're creative. 

The arbor/spindle/massive beams of radiation would be coming out of the center of that.


The other end end of the mainspring attaches to a short, fat cylinder called the going barrel.
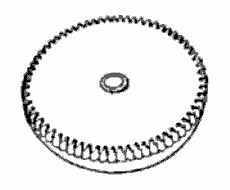
Also Wikimedia.
The barrel is free to spin, which is a good thing, because the barrel cylinder is capped with what is essentially a solid gear. This gear is used to interact with the gear train, which is the bit that makes the hands and other useful parts move. Its most important function, though is to power the balance, the little wheel that does for a wristwatch what a pendulum does for a grandfather clock.  

A real-life example: the going barrel in this watch is capped by the gear you can see in this picture. It also happens to be upside down.

Suppose you got bored at this point and thought, what the hell, we've got a power source and something that spins - let's just put some hands on it and let 'er rip! You'd have a timekeeping device of some sort, but right now there's nothing to counteract the force of that spring - you'd wind it, let it go, and it would release all its energy all at once. You'd measure time in spring-unwindings instead of seconds. 

That's where rest of the gear train comes in. That'll have to wait for part two, though. In the meantime, here's some watch porn for all you horologists out there. 

...that even sounds dirty.


Saturday, January 21, 2012

Google SketchUp 8 Tutorial - Drawing a Gear

I set out at around 5 PM today to draw a gear in Google SketchUp 8. How hard could it be? I said. It's only a couple of circles, I said. Five and a half hours later, I finally have this to show for myself:
Are you proud? I'm proud.


I spent an awfully long time looking for the tools I needed to make this, so I thought I'd put a tutorial out there about how I finally managed it. I'm going to assume that you have a basic working knowledge of SketchUp - what the premise is, how to use the more basic of the tools, etc. - but no more. So, in approximately 18 easy steps, here we go!

Step 0. One of the things I've really gotten used to in other graphics programs (namely, Illustrator and Photoshop) is the ease of using keyboard shortcuts. I'm so used to them that it's irritating that my favorites (Ctrl to switch to the last tool you used, anybody?) aren't here in SketchUp, but there are a fair number of easy-to-remember shortcuts that I used in drawing this. I'll list them where I think they're useful. I'd highly recommend getting used to using them, especially if you're using a touchpad instead of a mouse.

Step 1. Open Google SketchUp (I have version 8), and use the circle tool (keyboard shortcut "C") to draw a circle on the x-y plane. Here, I'm using red as x and green as y.

I made my gear with exact dimensions, so that's how I'll write the directions, but there's no need to be so precise. You can make most of the dimensions to be whatever you want. That said, there's an easy way to make your shapes with exact measurements. Here, I made a circle with a 2 cm radius. Using the circle tool, click anywhere, move the mouse a little distance away (don't click!), type "2cm", and press enter. You should have this:
Little floating circle. You're viewing it at an angle, so it doesn't look perfectly round.

Step 2. Using the line tool (L), draw a 15 cm line from the center of the circle out parallel to the x (red) axis This will be a guide line, so don't worry if it doesn't look like a gear. 

A couple of useful pointers here. To find the center of the circle quickly, once you've picked up the line tool, hover over the edge of your circle for 2 seconds, then move your cursor slowly toward the circle's center. A light blue dot labeled "center" should pop up. Your mouse should snap right to it. 

Although the line doesn't need to be drawn in any particular direction, I like orienting to the axes if only so I'm positive I haven't suddenly drawn a line in the z direction (out of the plane). When you're moving in the x direction, the line trailing from the line tool will turn red, and a popup box next to your mouse will tell you what direction you're going. You should have this after you've drawn your line: 


Step 3. Before I did the next step, I orbited (O) so that I had a top-down view of my figure. That makes it a little easier to draw the next bit. Using the line tool (L again), you're going to draw three sides of a square at the end of your guideline. Click on the endpoint of the guide, draw a 1 cm line in the same direction, turn right to draw a 1 cm line in the green direction, and right again to draw one last 1 cm line in the red direction. This will be your first gear tooth. 
Ignore the blue line. I just spun the view around a bit. 

Step 4. Use the eraser tool (E) to erase the very first line you drew.
First tooth! It's so cute.

Step 5. Select the gear tooth by pressing the spacebar and click-dragging over all three lines. (Side note: there is a difference between dragging right-to-left and left-to-right. The Google SketchUp video tutorials explain this very well, so I won't.)


Step 6. This step can be finicky, but I'll try and break it down as best I can. First, choose the rotate tool. Find the center of the circle again and click once. Move your mouse along the red axis and click again - it really doesn't matter how far along you go. Now, before you do anything else, press Ctrl (Option on a Mac) once. A small plus sign should appear next to your cursor. This means that SketchUp is not only going to rotate our tooth, it's going to be duplicated as well. 

Step 6a. Move your mouse clockwise a small distance. Type "360" and press Enter. 

Creating the first duplicate. You can do this by hand - just move the duplicate tooth in a full circle so that it overlaps the original, then click. I had trouble with this, though - as soon as I overlapped the first tooth, the counter at the bottom right would click back over from 359.9 to 0.0, and that would mean that you're not rotating through any degrees. Easier to just type in 360.

Step 7.  Before you do anything else, type "/50" and press Enter again. What you just did was tell SketchUp to rotate the tooth through 360 degrees, then duplicate it evenly 50 times through the whole circle.


Starting to look gear-like!

Now, 50 was a semi-arbitrary number that I chose. It just happened to make a regular-looking gear. If I were modeling this for physical production, I'd be much more careful in how I sized the teeth. At this point, any number that makes the gaps nearly the same size as the teeth will do. 


Step 8. This is the tedious bit. Take the line tool again and connect the bases of all the teeth together. 

Connect the teeth bases endpoint-to-endpoint. Takes a while, but it's gotta be done.
Step 9. When you connect the last one, the shape you made should turn gray, meaning that it's no longer a line - it's a face!
Ok, that wasn't really a step. I just added it in because I mis-numbered my screenshots and I needed an extra one to make them line up with my notes.


Step 10.  Now we have to set some guidelines so that we can form the spokes of our gear. This is another slightly finicky process, so be methodical and take it step by step. 

Choose the protractor tool (Tools menu > Protractor) and click in the center of the small circle. Now, move your mouse along the red axis (again, any direction in the same plane is fine, but the red axis is convenient). Click anywhere on the line you chose. Move your mouse clockwise slightly. Type "72" and press enter. A dotted guideline should appear 72 degrees clockwise from the red axis. 

Now, do the same thing again, except this time, instead of moving your mouse along the red axis, move and click along the guideline you just made. You should have two guidelines now. 

Repeat those steps three more times, each time clicking first in the center of the circle, then along the newest guideline before moving the mouse clockwise and typing in "72". 

You should have something like this:
Gear pizza.

I did one more thing to make my life easier later on. We're only going to be using half of those guidelines, so I used the rectangle tool to mark every other one.

Step 11. Use the push-pull tool to pull your gear up 1 cm vertically.


Step 12. Before you start this step, orbit (O) to the bottom of the figure. This will make your guidelines easier to work with.  Using the offset tool (F), offset the center circle first by 12 cm, then by 3 cm. 


 Step 13. Choose the line tool. Using the marked guidelines, connect the two circles you just drew. Make sure that when you draw them, the "intersect" symbol pops up as a red cross when you hover over the points where the guidelines and the circles meet. I thought I had a picture of this step, but I don't.

To make your figure look like the next picture, use the eraser tool to remove the guides. Then, using the offset tool on each of the slices you just made, offset them inwards by 0.5 cm.
Sorry, that's a lot of steps with very few pictures. To clarify: this picture shows five "spokes" alternating with five curved pieces. The thin spokes are the lines that you draw to connect the outer and middle circles. The curved pieces are what you get when you offset the shapes from the first step by 0.5 cm inwards. 


Step 14. Use the eraser to remove the thin spokes, leaving only the curved slices behind. 


Step 15. Use the push-pull tool to push the fat arcs through the gear to make windows. I found that I had the best luck with this when I entered "1cm" manually after clicking on each shape with the push-pull tool. Otherwise I had a tendency to just push them all the way through to the other side.


Step 16. Orbit to the other side again. Using the offset tool, offset the rim of the inner circle 0.25 cm outwards. (This is another one I wish I had taken a screenshot of, but didn't. Essentially, what you want to do is widen the center hole so that you can easily erase the surface that's in the middle.)

You should have a very very thin sliver of a hollow cylinder surrounding the center circle. Push that sliver through the gear 1cm, so that you have a thin window. Now, select the gray face that's left over and delete it.

Note: If you turn the gear back over, you'll note that it looks hollow. This is easily fixable by using the scale tool to shrink the middle edge of the gear in to meet the center hole. Press Ctrl (Option on a Mac) to highlight the center of the circle, then pull one of the corner handles in until the edge of the gear and the edge of the hole overlap. 


Step 17. Now, all that's left to do is color it! I modified the stock corrugated metal skin to look more like brass, but you can do whatever you want with it. 


And there you have it! I know there's some stuff here that is a little roundabout and could probably use some tweaking. Do you have an easier way to make a gear? Let me know in the comments!


Tuesday, January 17, 2012

Speechless

Waiting in line at Dunkin' Donuts the other day, I met Jonathan. I thought he was an asshole. 

 I got in line behind him. He turned around and caught my eye, then gave me the most over-the-top, exaggerated "'sup?" nod I've ever seen. Odd, I thought, but that's hardly unusual for downtown, and I let it go as one of those subtle markers that I work just above a major transportation hub. Trains do tend to bring in the crazies. After he ordered, I saw him leaning over the row of coffee pots, pointing at his cream-filled coffee and gesturing for the employee behind the counter to remake it. Oh great, I thought. One of *those* customers - the ones who think it's beneath them to actually open their mouths to speak to a server or retail employee. I watched him and the entire counter staff getting more and more frustrated - "Black?" they kept saying. "You want black?" Crap, I thought. This guy (who was black) is already pissed off, he's going to take that the wrong way and I don't want to know what'll happen next. Finally, Jonathan made that universal gesture for "Give me a goddamn piece of paper so I can write it down for you," and I finally got it - he's deaf. 

Feeling really incredibly proud of myself for being such a non-cynical person and reserving judgment til after I had all the facts, I followed him down to the food pick-up area, where he gave me a look that said, man, sometimes this is tough. I smiled back at him, and lord knows why, but I fumbled around with my little bag of food enough to sign at him, 


SIGN LANGUAGE?


Oh crap, I thought. I know less sign language than I do Spanish. I can't have a conversation with this guy! But his face lit up and he was signing back, 


YOUR NAME WHAT?


Well now, I know that one. With a bit more bag fumbling, I managed:


MY NAME E-M-I-L-Y

(Actually, I managed "I NAME E-M-I-L-Y". Quick lesson break: hand shapes are really important in ASL. You use a pointing finger for personal pronouns like me, he, she, it, them, and so on.


 A flat hand shape, like the one you'd use to swat a fly, is used for possessive pronouns like my, theirs, yours, etc.)


YOUR NAME? I asked (Well, in my pidgin ASL, I said YOU NAME, but he got it).


J-O-N-A-T-H-A-N

Blushing like an idiot at my awkward language skills, I said hi again. 


YOU WORK HERE? he asked.

And I was signing 

NO, NEXT DOOR 

and clumsily fingerspelling the name of my company before I realized that I didn't know I knew the sign for work. Who knows where I picked that up - and who would've known it would come in handy down the line during a chance meeting at lunch. 

Then the server came back with his sandwich and he signed


NICE TO MEET YOU. SEE YOU LATER!

And I waved to him and he was gone.


Oh yeah, there was a bird: